How to apply default Rapid GO settings to an individual site
- Go to the Access module.
- Enter the Site Info area.
- Select your site using the Location dropdown on the left-hand side.
- Go to the Rapid GO section.
- Select Package Defaults from the Configuration dropdown:
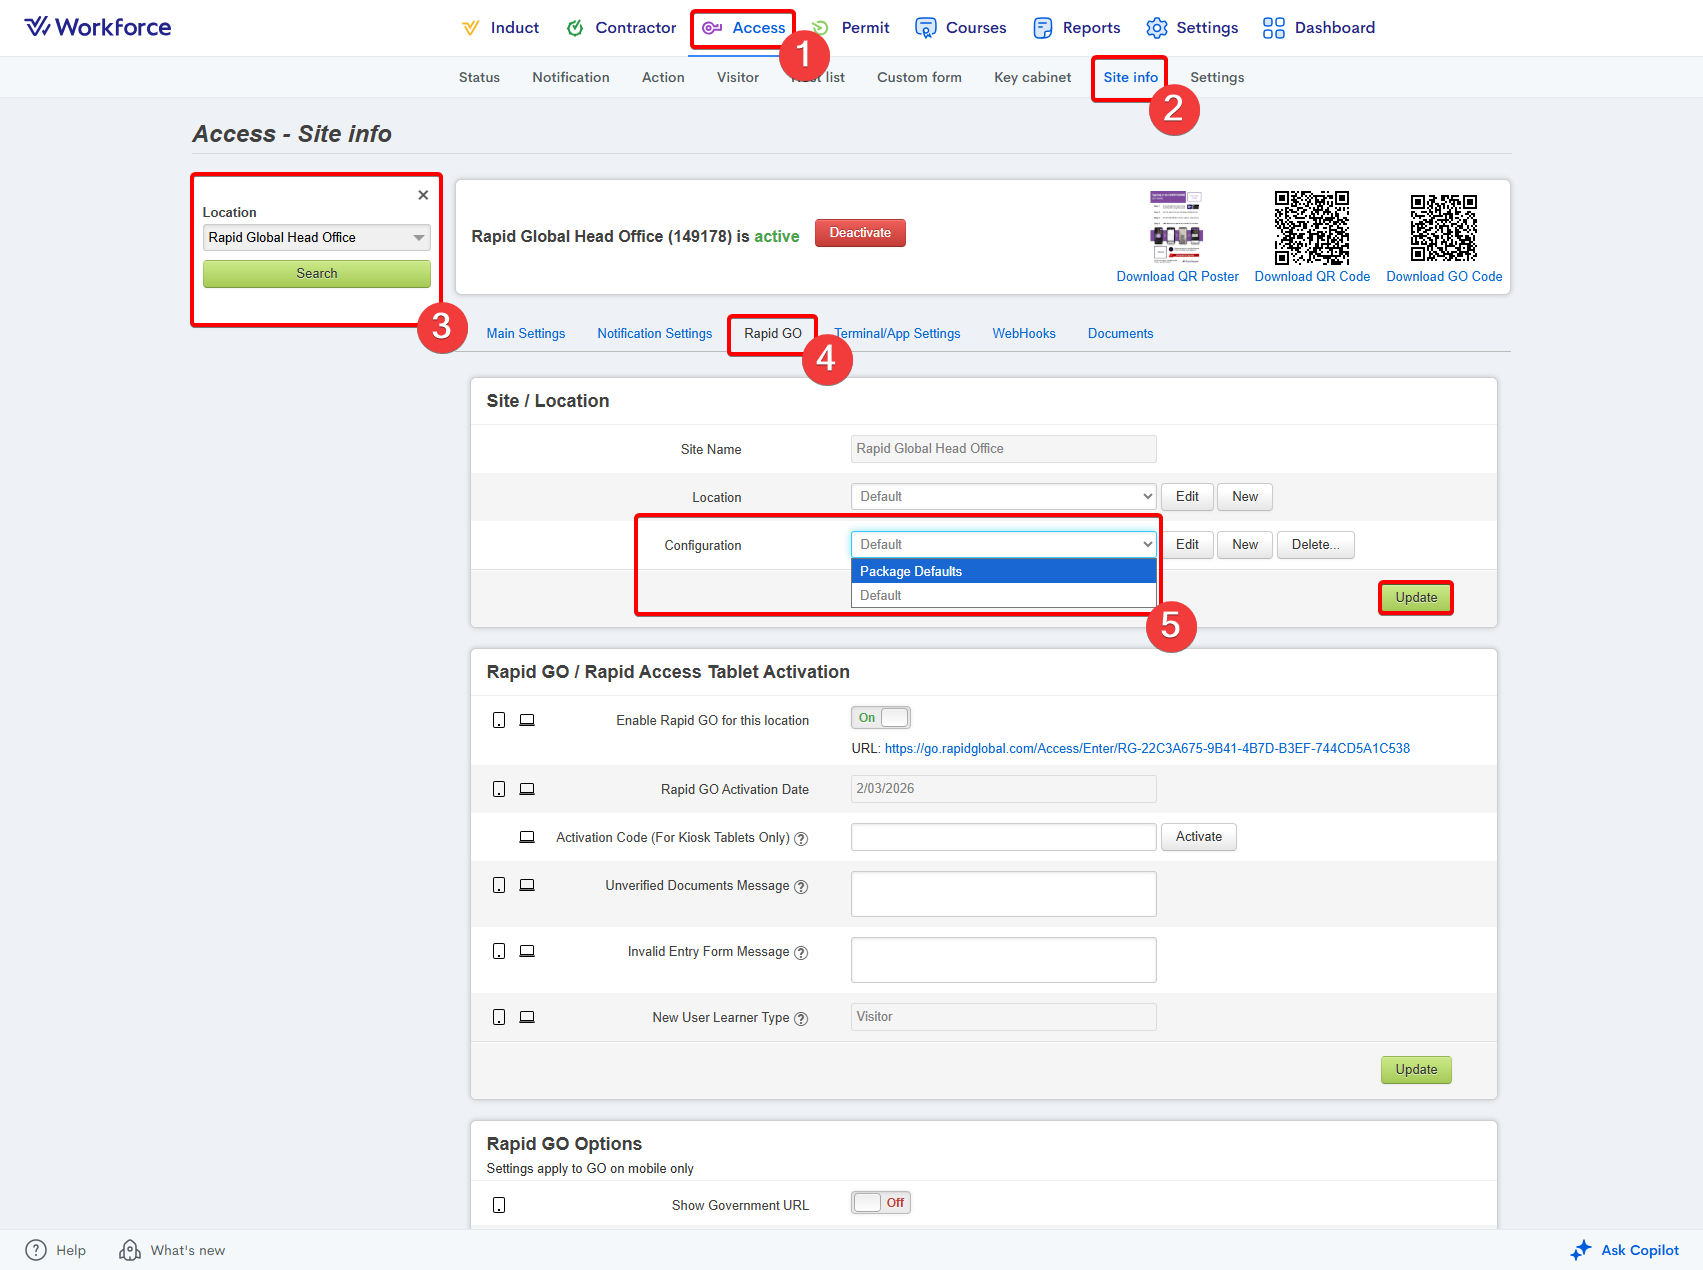
 Please note: The configuration change will automatically save.
Related Articles
How to apply default Rapid GO settings across all sites
Go to the Access module. Select the Settings section. Enter the Default Rapid GO Settings area. Press the Apply Default Settings to All Sites button: This will apply the Default Rapid GO Settings across all sites within your package. Please note: The ...
How to configure default Rapid GO settings
Go to the Access module. Enter the Settings area. Select the Default Rapid GO Settings menu: Enabling Geolocation: Scroll down to the Rapid GO Options section. Enable the Allow Location Based Sign In option. Press the Update button: Adjusting the ...
How to download a site's Rapid GO QR code
Go to the Access module. Enter the Site Info area. Select the site using the Location dropdown on the left-hand side. Press the Download GO Code QR code in the top right of your page: Press the Export to PDF button to download the QR code as a PDF to ...
Enabling geolocation for Rapid GO
Go to the Access module. Enter the Site Info area. Select the site using the Location dropdown: Scroll down the Main Settings page to the 1.00 - Property Details section. To the right of the Geo Location option, press the Get From Map button: Enter ...
How to activate a site in Rapid Access
After you have created your site within the Settings module in the MyRapid Administrator portal, you must activate the site within Access to be able to enable a sign-in system for your site. Please not that this does NOT automatically enable the ...